Free Shipping
On orders $99+
On orders $99+
Maybe you’ve thought about illuminating your room with ambient lighting or adding accent lighting for artwork you have on display. Ceiling recessed lighting would be the perfect solution, but you have one major problem keeping you from installing them. No attic. When rooms are on the first floor of a home or there isn’t attic access you’ll have to think of another way to put in your recessed lighting. Luckily, there are steps that you can follow for proper installation even if you don’t have attic access.
First, it’s extremely important that you contact a professional before you even begin. Dealing with anything electrical is dangerous if you’re inexperienced. Before you begin, create a blueprint. Then, get all the necessary materials. Buying recessed lighting may be a little confusing but luckily there are tips you can take advantage of. Keep in mind, this project is no easy task; it will require a lot of time and labor to complete. However, if you choose to install recessed lighting on your own, it will save you a ton of money and you’ll finally have the look you’ve wanted for your space.
Materials Needed
You will need a lot of materials for the project so be sure you have them all before starting the labor. It would be a shame to have to stop in the middle because you forgot to pick up wire cutters!
• Housing & Trims: Recessed lighting has two parts – trim. The trim is the exposed part of the fixture and comes in various finishes, sizes, and shapes. Housing is the lamp holder. It is hidden because the housing is installed into the ceiling. You’ll want remodel housings because they are for houses with existing ceilings. If you want to cast a spotlight, then get a reflector trim since it produces a narrow beam ideal for making a focal point.
• Keep a pencil handy for marking the ceiling and a hand del-drywall saw to cut through it.
• Get a stud finder to locate any joists, which supports the structure, that will obstruct the placement of the lights. Add wire strippers, wire cutters, 100ft long wire connectors, drill and wood boring drill bit, tape measure, and screwdriver. It’s easy to overlook any of these items. That is why you need to make sure you have all the supplies first.
• If you want to cause minimal damage to your drywall, you’ll need a drywall panel, spackling compound, and drywall screws to cover those holes and replace those missing drywall pieces. It’s best to use gloves and safety glasses for protection.
• Lastly, have a ladder at the ready but be careful while using it.
Note, it’s important to have the correct recessed lighting for your project in order to have adequate lighting and prevent overheating that could cause a fire. So be sure to consult with a professional when purchasing your lights.
How to Buy Recessed Lights
There are many types of recessed lights, from shapes to sizes, that you can choose from. For ambient lighting, 5-inch diameter fixtures are ideal. Go with 4-inch diameter low-voltage fixtures if you’re looking for accent lighting. Housings must be compatible with the trim styles and lamps so look at the labels in the housing packages for a list of compatible parts. Buy standard housing for open framing, which includes mounting brackets. Remember, you need remodeling housings because you don’t have attic access. Housing that will be covered with insulation need insulation contact (IC) rated housing as a safety precaution against combustible material.
For non-IC housing, you will need to leave a minimum of a ½ inch from the combustible material. Thermal insulation requires a minimum of 3-inches of space from the housing. You can choose airtight housings for energy efficiency. Low-voltage housings use standard 115-volt wiring, but they have built-in transformers allowing them to convert for use on a 12-volt MR-16 lamps. Low-voltage recessed lights are useful because by changing lamps and trim styles you can control the accent lighting.

You can use halogen light bulbs, but they produce a lot of heat and consume a lot of energy. Dimmable 60-watt CFLs are a suitable alternative. They aren’t as good as incandescent and halogen bulbs because CFLs have lower quality dimmers. But if you’re willing to overlook that because CFLs are more practical, get a CFL dimmer.
You can go to home centers for fairly priced housings and trim. If you have a need for a harder-to-find light, such as a 4-inch low-voltage fixture, then you can special order them. If you’re looking for a wider selection of fixtures, then lighting showrooms are go-to. They can give you tips and ideas about lighting design as well. You can check out our in-depth guide on buying recessed lighting for more tips.
How to Install Recessed Lighting
So, you want to install recessed lighting but you don’t want to destroy your ceiling in the process. Or you’ll wind up paying the very expensive cost of repairing the damage and hiring professionals to do the recessed lighting installation. Knowing a little about wiring and installing electrical boxes is a must so educate yourself beforehand.
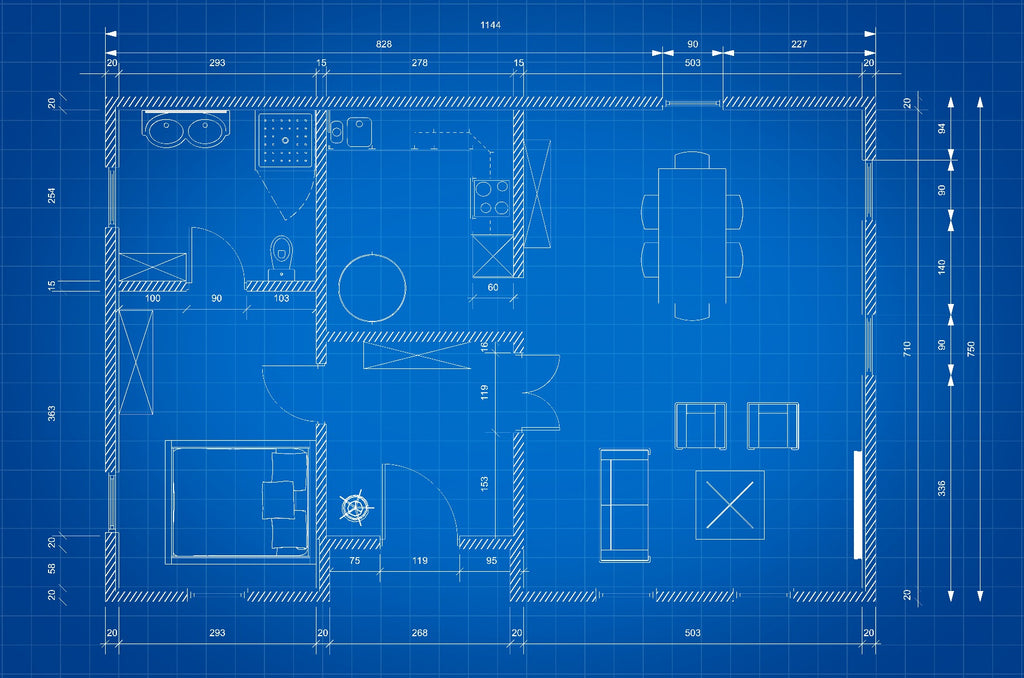
1. Sketch an accurate lighting plan
To make sure you get the installation right the first time around, draw up a lighting plan. Use graph paper and measure the room to scale, with ¼ inches equaling 1ft in your sketch. Include your furniture arrangement and any features you want to accent, such as artwork or accolades. Your sketch will show you the number lights you will need and the spacing of them. You should keep the lights 4ft apart from each other. Know your lighting purpose – is it for art, task lighting, ambience? If you’re unsure whether your drawing is a good reference to use for your project, then take it to a lighting showroom. A lighting design expert can help you with your plan. They can show you which fixtures and parts to choose and where it’s best to install them. If you’d like to save money then go to a home center. However, the selection is not as wide as a showroom.
2. Locate a circuit
You can use an existing power source, but if that is not an option then use a switch controlled power outlet. Find a junction box that has a “hot” or black wire. Do not connect to any “dedicated” circuits, or circuits that are already plugged into an appliance. Otherwise, the circuit may overload. Shut off the circuit in the main panel or unscrew the fuse. For boxes that have more than one circuit you will need to use a non-contact voltage tester so you know that the circuit is off. Then do a walk-thru, turning on all the switches throughout your house so you can see what’s already connected to the circuit. Insert circuit tester plug into the electric outlet you turned off. For safety, move to another circuit if whatever is connected to it turns on.
Add up the wattage for what doesn’t turn on. Next, add to this total the wattage of lights you’re installing. Don’t connect more than 1,440 watts for a 15-amp circuit and 1,920 for 20-amp circuit. Connect to another circuit if your watts are more than your circuit can handle. Or you can replace the box with one that has built-in cable clamps and can handle the wattage. If you have aluminum wiring, which is gray in color, call a professional who will help you safely install the box. Junction boxes should be listed for “through branch circuit wiring” so you can run one cable in and one out from fixture to fixture.

Tip: How to Calculate Box Sizes
The National Electrical Code requires a minimum box size. To calculate the size, add 1 junction box for each hot and neutral wire entering the box, 1 junction box for all the ground wires combined, 1 for all the clamps combined, and 2 boxes for each device, such as a switch or receptacle but not light fixtures, installed in the box. Multiply this number by 2 if it is a 14-gauge wire and 2.25 for 12-gauge wire for the minimum box volume in cubic inches. Calculations aren’t necessary for plastic boxes because their volume is labeled inside the box.
3. Cut slot in ceiling and fish cable
Cutting a hole in your wall will help you install the housing and wiring if you don’t have access to an attic. If you can’t get to the joist spaces, then you will need to remove about 12 to 16 inches of drywall from your ceiling with a hand-held drywall saw. Your joists should be in your lighting design plan. Use a stud finder to locate your joists, which supports the structure. The piece you remove should be 6 inches from the wall and be big enough to include all the joist spaces that will have fixtures and power sources. You will need to make a path to run the cables so drill through the top wall plate of the joists for running the cables. Drill a small hole into the joist to see if it is at least 7 inches deep to hold the housing.
Measure and mark the ceiling with a pencil where you want to the install lights, making sure there are no joists or other obstructions. The mark should be at the center of each recessed light. The recessed light packaging might come with a paper template for tracing circles to represent the light’s diameter. Otherwise, just trace around the housing. Then use the drywall saw to cut out the circles. Note, that it’s best to contact your local health department to find out whether you may be exposed to asbestos. Some insulating materials, sprays, and plaster and joint compounds may contain it if you have an older house.
4. Tips for selecting and installing your cable
The cable you select depends on the circuit rating. You need a 14 gauge for a 15-amp, or current, and a 12 gauge for 20-amp. Keep your cable 15 percent longer than needed, with about 2ft of extra cable hanging from each opening you’ve created. If you can, staple the cable to the joists. All drilled holes should have no more than one or two cables running through it. Make sure you drill the holes 2 inches from the top and bottom of the joists. Strip 12 inches of sheathing with your cable cutter then slide it into the electrical box. The sheathing should extend ¼ more from clamp.
5. Wiring and installing lights
For a switch-controlled power outlet, run wires from the outlet up to the ceiling from inside the wall. Pull the cables through the recessed lighting holes, with fish tape if necessary, leaving about 6 inches hanging from the holes. Also have 6 inches hang from the outlet. Connect the red wire from the switch to the black wire you are running to the ceiling. If necessary, cut a piece of the drywall where the ceiling and wall meet to run the wire from the wall to the ceiling. Grab a fixture and remove its junction box cover. Use your wire cutter to cut 3 inches from the outer insulation jacket of each end of the electrical cable so the internal insulated wires and copper grounding or green insulated grounding wire are exposed. Be careful not to damage the copper wire. Then insert the electrical cable through the hole on the light fixture’s electrical box.
To attach the wires to the box, just connect the white wire to the other white wire, black to black, or green to green by twisting the wires together. You can screw on a wire nut, or splice, to secure the connection if you want. For an electrical outlet, wrap the black wire counterclockwise around the brass-colored terminal screw. Then use your screwdriver to tighten the screw. Twist the two bare copper grounding wires with the metal end of the green insulated pigtail wire and place the green splice on it. Screw the pigtail into the junction box. Do this for all light switch wires because it will ground them. Be sure to not cross wires while you are attaching them to the light switch.
Place the junction box and housing into the ceiling hole and push in the light fixture until it’s flushed with the ceiling. There are four tabs inside the fixture that you press against the fixture to lock it in place. Insert the light bulbs, turn the power on and watch your lights illuminate the room! Once you’re done installing the recessed lighting, use the ceiling pieces you saved and patch the wall and ceiling with spackling compound and drywall screws. If your ceiling has a knockdown feature, or a textured ceiling to hide blemishes, then use a knockdown texture spray if you’d like.
Note: you must get an electrical permit and have the local building department inspect the lighting after you’ve installed it all.
Difficulty, Time, and Cost
Installing lights is a very technical process that requires basic electrical knowledge and heavy labor. Unless you are familiar with electrical components, it is best to contact an electrician for safety. Recessed lighting fixtures have a broad range of prices. They typically cost about $17 each and trims will run about $20 each. Home centers may sell housings and trim within that price range up to about $40 but are limited in selection. If you decide to hire a professional, then installing 12 lights could cost you close to $1,000 for just the labor! The professional will take about 2-3 hours, depending on the room and number of lights, but the cost is pretty high. The entire fixture itself has a wide price range. Some fixtures will cost $50 and below to $100 for each fixture. If you choose to install LED lights, then that number increases by a bit. They run for $150 each but will last for years. So, if you’re comfortable with the process, it’s best to just take on the project yourself.
Installing recessed lighting in your room can brighten a poorly lit space, add style, and create your desired atmosphere. Make sure you draw up a plan and gather all the materials that you will need before you begin your project. Remember, it is important to know how to buy recessed lights and to not stray from specs or you risk improper lighting and dangerous overheating. Be careful during the installation process. This DIY project is cost effective but only do it if you are confident about the process and willing to put in the work.
Sources
https://www.remodelaholic.com/install-recessed-lights-without-attic-access/
Installing recessed lighting when there isn't access to an attic is a common problem. You’ll need remodeling recessed lights, a pencil, a hand-held drywall saw, wire strippers, wire cutters, and a flat screwdriver. The project requires electrical experience, so hire an electrician if necessary. Mark the ceiling where you plan to install the lights. Joists may obstruct you from making any holes in the ceiling so use a stud finder to locate them. Once you make a small hole in the ceiling, check for obstructions inside with a bent coat hanger. Trace a circle using the paper template from the recessed lighting package where the lights will be installed, then cut around it with the drywall saw. Remove the junction box from the fixture. Pull the wires from the hole in the ceiling and feed them into the junction box and connect them. Strip about ¾ of an inch from the end of the insulated wires using the wire strippers without damaging the copper wire inside. Connect the same colored wires to each other. Place the junction box and the arm of the light fixture into the ceiling hole, making sure it’s flushed with the ceiling. The four tabs inside of the opening of the fixture must be pressed flushed against it and locked into place. Next, insert the light bulbs and turn the power back on. Your light should now work once turned on. A professional can complete the install in about 2-3 hours. 6 remodeling fixtures will run you about $50. A good quality, long-lasting LED light bulb will cost you about $150.
https://homeguides.sfgate.com/install-recessed-lighting-access-attic-29524.html
Finished rooms require remodeling electrical boxes or old-work boxes to install electrical outlets, light switches, and lights. Without an attic, recessed lights must be installed from below the ceiling instead of the top. Remodeling recessed light housing is the required model for the project. Its wires are held inside an electrical box that is connected to a metal light can. When the can is installed into the ceiling, clamps on the side expand, securing the fixture. Recessed lights may be used for ambience. To install recessed lights, locate the main circuit breaker and turn the power off for the room where you’re installing the lights. Put a circuit tester plug into an electric outlet to ensure the circuit for the room is off. No light should turn on. Place the light up to the installation location and trace around the housing or housing template with a pencil. Drill a ¼ hole in the center of it. Then use a key hole saw to start cutting from the hole and around the traced circle. Remove the face plate of a nearby electric outlet or junction box for the light switch and light. Separate the electrical outlet and the electrical box by removing the screws to expose the wires. If you have a junction box, then pull wires from it instead. The light switch should be installed halfway between the recessed light and electrical outlet. Make a mark on the wall 52 inches above the floor and center the electrical box for the switch around it. Trace the box and drill a hole in the center of it. Cut it out with the key hole saw. Then pull the electrical cable out from the recessed lighting hole to the light switch hole. Pull 6 inches of the cable from the wall using fish tape and cut with wire cutters. Cut cable from the ceiling hole so that it’s 6 inches long. Run the electrical cable into the hole on the remodeling electrical box and put the box into the light switch up. Press it until the clamps click to secure the box. Put the cable through the cable clamp on the housing. Use a utility knife to cut 3 inches from the outer insulation jack of each cable end. This will expose the wires and grounding wire that will be either bare copper or green. Twist the two bare copper grounding wires around the metal end of the green insulated pigtail wire. Put the green splice on it and screw the pigtail into the junction box to finish installation.
http://diy-recessed-lights.fidke.com/
Recessed lighting are a modern and stylish way to light a room. You can buy $17 lights and $20 trims. However, labor can cost you $720 to install 12 lights. You’ll need retrofit recessed lighting housing made of 3 inch halogen. Be sure it’s not construction housings. If you use halogens bulbs, note that they use a lot of heat and energy. You can use dimmable CFLs (60W) bulbs but they dim less than incandescent or halogen. Your recessed lighting trim model should be a reflector for focused light beam similar to a spotlight. You’ll need 100ft of wires, which are thick and firm, and wire connectors to attach them together. Have the following materials at the read: wire cutter or stripper, pliers, utility knife, tape measure, ruler, drywall saw, stud finder, a drywall panel, spackling compound and drywall screws to repair holes, a ¾ drll and wood boring drill bit for drilling through ceiling joists, ladder, gloves, and safety glasses. A knockdown texture spray is optional. The first step is installation planning. Find the joists in the area where you’re installing your lights and wiring. Calculate the number of lights and its spacing by dividing the ceiling height by 2- “ceiling height rule of thumb.” Create a sketch for a visual. Give 4ft of space between each light. Determine how you plan to run the wiring to the lights. A switch controlled power outlet can be used if no existing power source is available. Measure 4ft along the edge of the ceiling. From there, draw a 4ft line towards the center of the ceiling to the installation location. When measurements are not exact, avoid uneven spacing by starting from the corners of the ceiling, instead. To use an existing power for powering the lights, remove the existing lighting. If you’re using a switch controlled power outlet you’ll need to run the wires through the wall to the ceiling. Connect the red wire, the power from the switch, to the black wire, which runs to the ceiling. Cut a hole into the drywall where the wall meets the ceiling to pull wire within the wall to the ceiling. A hole must be cut beside each joist so that you can reach it with the drill. Keep track of drywall pieces so you can patch the wall afterwards. When drilling, be sure you’re follow building codes. Once you have done the wiring, follow the manufacturer’s instructions for connecting to the lights. Cover the holes by patching them with the saved drywall pieces.
Helpful Links:
Comments
Leave a comment